Your IDE Is a Workbench
Learn the VS Code layout, open a real folder, and have a grounded first chat with an in-editor AI—without treating the tool like magic.
Published: May 18, 2026 · Part of the Mindful Automation series
Sprint 1 of May’s mindful automation arc had two beats: learn the room, then make your rhythms visible on disk.
Watch first: If you have not yet walked through the layout, start with the Week 1 screen-share — Your First 30 Minutes in VSCode (No Coding Required) (~15 min). That video covers install, Open Folder…, the Activity Bar, Command Palette, and making the window yours. This post is the written follow-up: mental model, where chat lives, and your first grounded conversation that stays tied to your files.
You do not need to write code to benefit from a code editor. You need a workbench—one window where your folder, your text, and (when you want it) an AI panel share the same air.
This guide uses Visual Studio Code as the stable teaching environment. If you use GitHub Copilot (or another extension that adds a chat side panel), the ideas transfer: open a project, point the assistant at real files, keep prompts specific. Product-specific menus change; the mental model does not.
Week 1: Screen-share walkthrough
Open Week 1 on YouTube if the embed does not load in your reader.
The mental model: IDE ≈ almost an Obsidian vault
If you have lived in Obsidian, you already know half of this: notes are files, the sidebar is structure, search is muscle memory, and the value is visibility—you can see what you have without opening twelve apps.
An IDE is similar, with two honest differences:
- It expects a “project folder” mindset. You use
File → Open Folder…and everything under that tree is the workspace. - It is comfortable with plain text everywhere. Markdown,
.txt, config files—the same habit as a vault-first workflow.
Some people keep a vault in one tool and a “shipping” folder in VS Code. Some live mostly in Cursor when they want heavier AI affordances and switch to something calmer when they do not. That bouncing is normal. The goal here is not a prescription; it is literacy. When you recognize “this is the same file-and-search game I already play,” the IDE stops feeling like someone else’s profession.
Bare basics: install, open a folder, meet the Activity Bar
- Install Visual Studio Code (free, Mac / Windows / Linux). The same layout applies in Cursor (VS Code–based, free tier; referral link, same price for you).
- Choose
File → Open Folder…and select the folder where your notes, templates, or project files already live. - Breathe. You are not committing to a lifestyle—just opening a drawer.
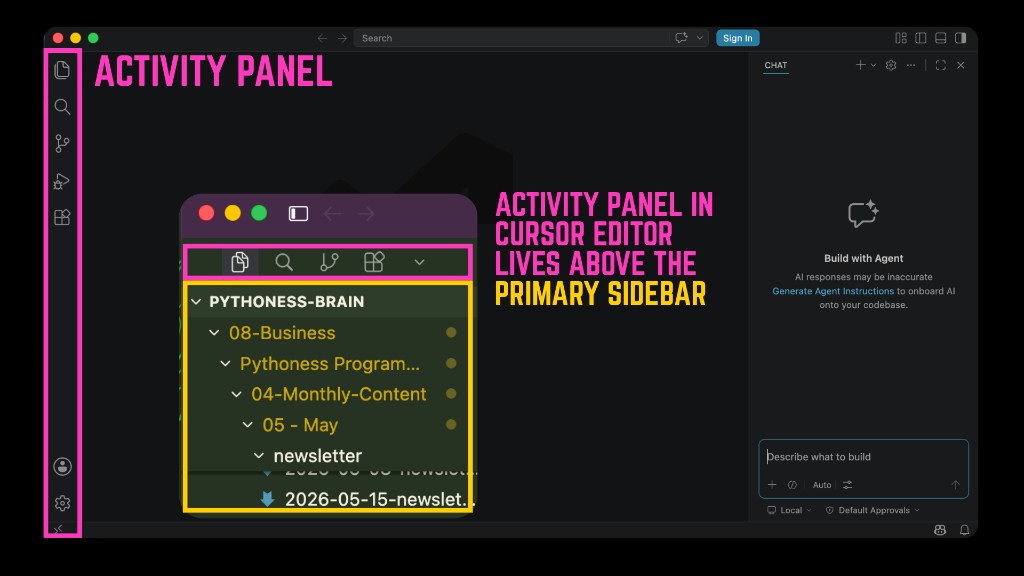
The Activity Bar and primary sidebar
The Activity Bar is the narrow strip of icons that opens the main “rooms” beside your files. In a default VS Code layout it sits on the far left; the wider primary sidebar shows the Explorer, Search results, Source Control, and so on.
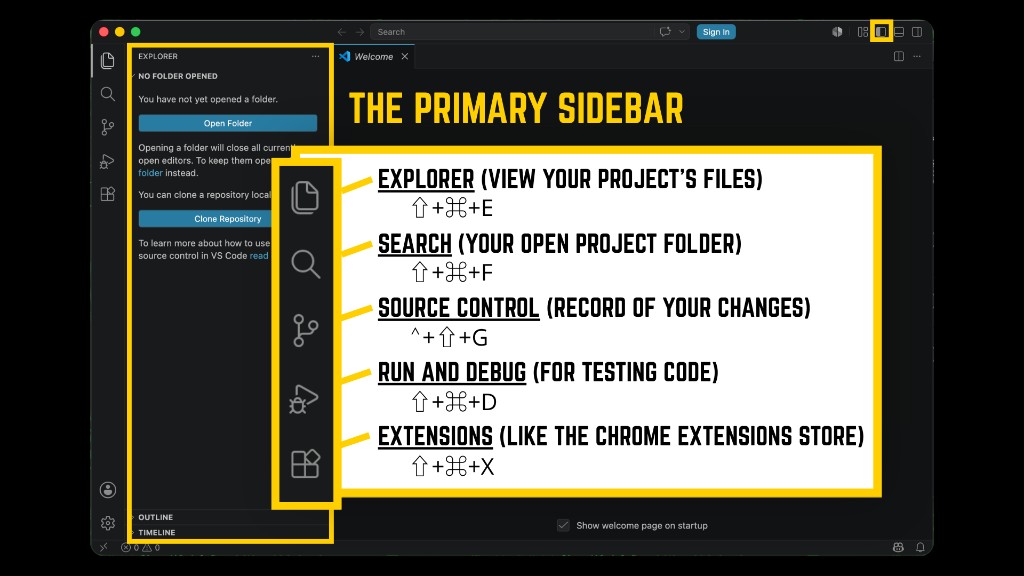
These five icons are the ones worth mapping first. Shortcuts below match the default Visual Studio Code keymaps on macOS and Windows (Linux is usually the same as Windows, with Super sometimes standing in for Ctrl depending on your distro).
| # | Room | macOS | Windows | What you use it for |
|---|---|---|---|---|
| 1 | Explorer | ⇧⌘E | Ctrl+Shift+E | Folder tree, create and move files |
| 2 | Search | ⇧⌘F | Ctrl+Shift+F | Find text across the whole folder |
| 3 | Source Control | ⌃⇧G | Ctrl+Shift+G | Git changes (ignore until you need it) |
| 4 | Run and Debug | ⇧⌘D | Ctrl+Shift+D | For running code later; skip for now if you are not coding yet |
| 5 | Extensions | ⇧⌘X | Ctrl+Shift+X | Themes, Copilot, linters |
Tuning the Explorer
You can slim the sidebar to what you actually use. Open the … menu in the Explorer header to toggle sections such as Open Editors, Outline, and Timeline.

Command Palette: plain-English navigation
⇧⌘P (Mac) or Ctrl+Shift+P (Windows / Linux) opens the Command Palette: searchable actions instead of memorized menus. When you are lost, type a verb (“Markdown,” “Git,” “Zoom”).
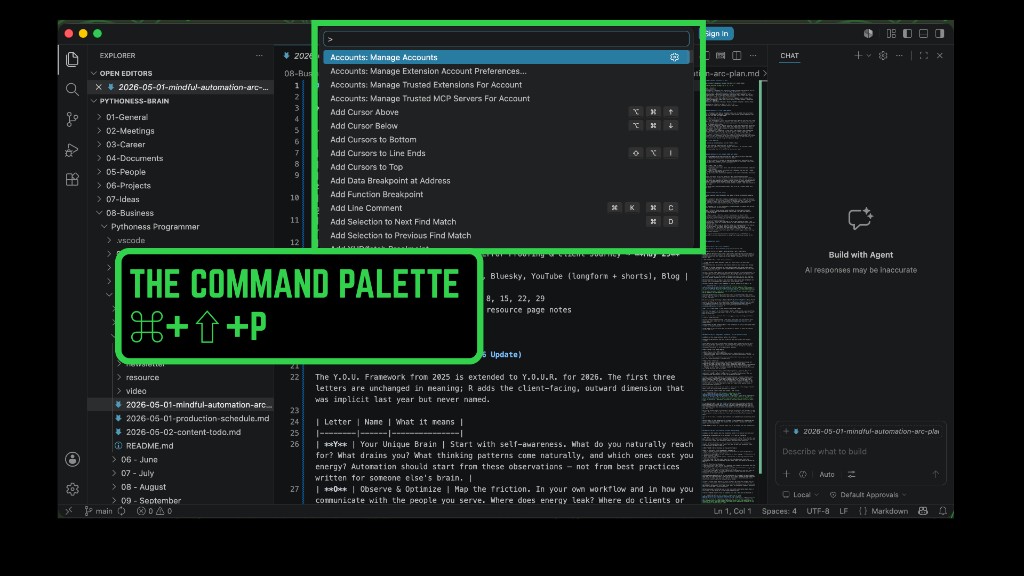

For Markdown, raw syntax in the editor is fine. When you want a rendered preview, the Command Palette (⇧⌘P / Ctrl+Shift+P) → “Markdown: Open Preview” (or the split-preview variant) does the job without a separate app.
The editor (center) and where chat usually lives
Click a file in the Explorer; it opens in the editor in the center. Many AI extensions dock chat on the right as a secondary sidebar so your prompt sits next to the file you mean—not in a disconnected browser tab you paste into.
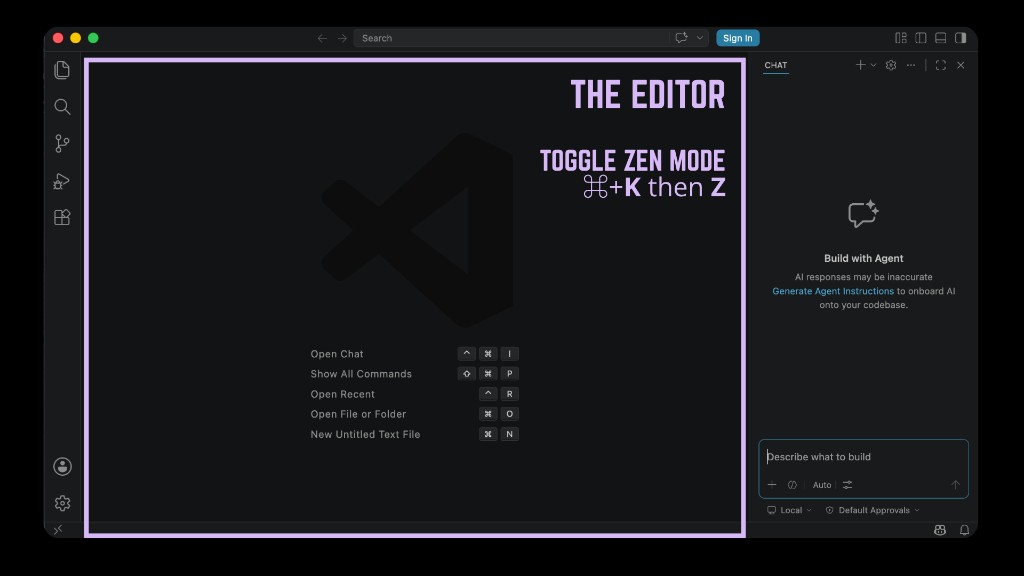
Zen Mode (⌘K then Z on Mac, or Ctrl+K then Z on Windows / Linux) clears chrome when you need a calmer surface. Press Esc twice to exit (default on both platforms).
In VS Code, AI chat usually arrives through GitHub Copilot Chat (extension plus sign-in) or whatever assistant your org approves. Menus shift between versions; after install, search the Command Palette for “Chat” or “Copilot.” The habit matters more than the logo: keep the file in view while you chat.
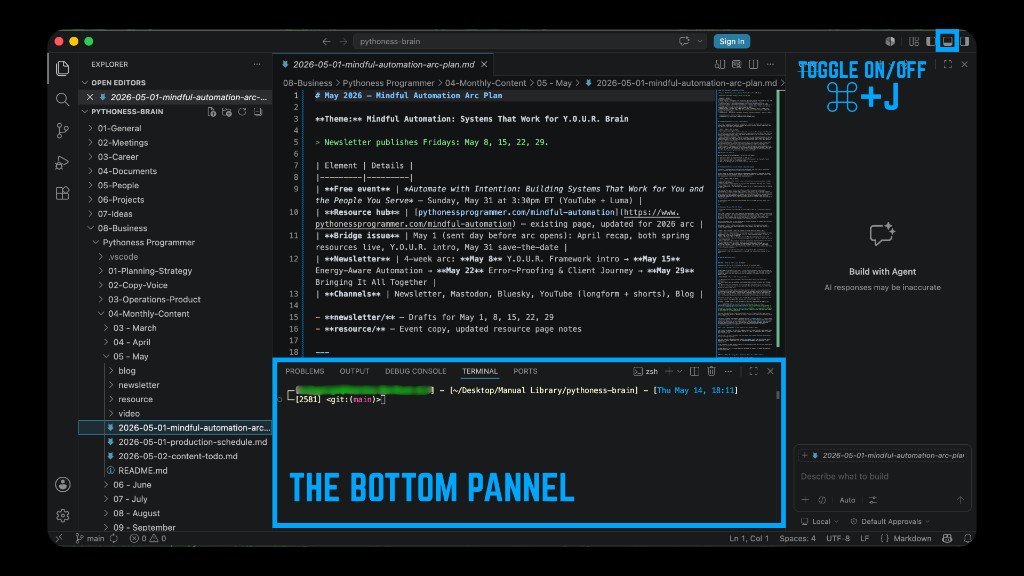
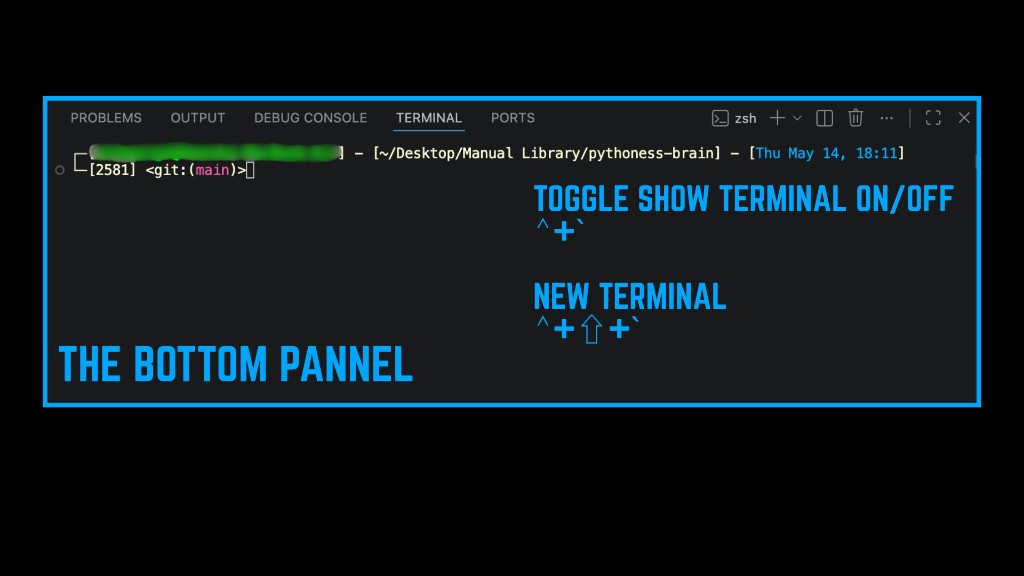
Bottom panel: terminal, problems, output
The strip along the bottom holds Terminal, Problems, Output, Debug Console, and Ports. You can hide the whole panel with ⌘J on Mac or Ctrl+J on Windows / Linux (toggle panel visibility) when you want more vertical room for writing.
When you are ready for the integrated terminal, ⌃ + on Mac or Ctrl + on Windows / Linux toggles it. ⌃⇧ + or Ctrl+Shift + opens a new terminal instance. Same “everything in one window” spirit; you do not need shell commands yet to benefit from the layout.
O — Observe & Optimize: make rhythms visible (written exercise)
This step is O in the Y.O.U.R. framework: observation before optimization—making your communication timing visible so you (and tools) can align with it. No separate video for this beat; work through it in your open folder.
Create my-rhythms.md in your folder. Before you open chat, draft bullet facts: newsletter send window, reminder policy, days you do not email, your best writing hours.
Then ask for something bounded, not cosmic.
Too broad: “Help me organize my communication workflow.”
Grounded: “Using only the facts I list below, write my-rhythms.md with sections for Newsletter, Reminders, Quiet hours, and Focus window. Under 25 lines, plain language, last updated at top.”
Paste your bullets; review every line; save the file yourself. The win is not clever AI—it is a file you can point to when templates, @mentions, and your automation playbook enter the story later this month.
What the assistant can see (and why privacy is a mindset)
Typical in-editor assistants can read:
- The file currently focused in the editor (and sometimes adjacent open tabs)
- Files you explicitly attach or
@-mention (wording varies by product) - Not your email, calendar, or cloud drives—unless you paste them in
Treat that boundary as feature, not failure: you choose the context. Keep sensitive client material out of the workspace you index for experiments, or use a dedicated folder with only decoy or sample text while learning.
Privacy mindset (short):
- Read the vendor’s data handling page before you paste secrets.
- Prefer workspaces you control over “dump everything in.”
- If a setting mentions training, logging, or “improve the model,” decide consciously—especially for HIPAA-, NDA-, or identity-heavy work.
If you also use Cursor (high level, because UIs move fast)
Cursor-style tools sit on the same VS Code skeleton; shortcuts and panel names drift between releases. One layout difference that trips people up: in Cursor, the activity strip is often horizontal above the file tree instead of a vertical bar on the far left.
Instead of screenshot-chasing every release:
- Open Settings and search privacy—note what is sent off-device and what stays local.
- Search telemetry and indexing—large personal archives may deserve excludes (often
.gitignore-style ignore files). - Teach yourself where the chat panel gets its context (open files vs mentions). That mental model survives UI churn.
Quick reference
| Action | macOS | Windows / Linux |
|---|---|---|
| Command Palette | ⇧⌘P | Ctrl+Shift+P |
| Explorer | ⇧⌘E | Ctrl+Shift+E |
| Search | ⇧⌘F | Ctrl+Shift+F |
| Source Control | ⌃⇧G | Ctrl+Shift+G |
| Run and Debug | ⇧⌘D | Ctrl+Shift+D |
| Extensions | ⇧⌘X | Ctrl+Shift+X |
| Toggle bottom panel | ⌘J | Ctrl+J |
| Toggle terminal | ⌃ + ` | Ctrl + ` |
| New terminal | ⌃⇧ + ` | Ctrl+Shift + ` |
| Toggle primary sidebar | ⌘B | Ctrl+B |
What's next in the arc
You now have visible structure + a rhythms file on disk—the Sprint 1 written payoff.
- Friday May 22: Error-proofing and client journey design in the newsletter, plus written IDE tips (@mentions, templates,
ls) in the resource guide—no new video that week. - Friday May 29: One capstone screen-share (files → rules → playbook → GitHub) plus a combined blog post—the only video for Sprint 2.
- Sunday May 31: Live event — register here.
Part of the Mindful Automation series — pythonessprogrammer.com/mindful-automation
Questions? Hit reply on the newsletter or find me on socials linked from pythonessprogrammer.com.